let A = '사과'
<script>
let a = ['사과', '수박', '딸기', '감']
let b=3
console.log(a[1])
</script>
- 리스트에 몇개가 담겨있나 길이를 보자
<script>
let a = ['사과', '수박', '딸기', '감']
let b=3
console.log(a.length)
</script>
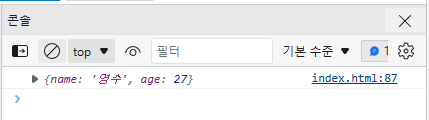
- A안에 name과 age를 저장
<script>
let a = {'name':'영수','age':27}
let b=3
console.log(a)
</script>
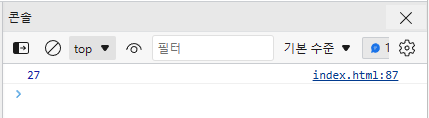
- 딕셔너리 key=Value
<script>
let a = {'name':'영수','age':27}
let b=3
console.log(a['age'])
</script>
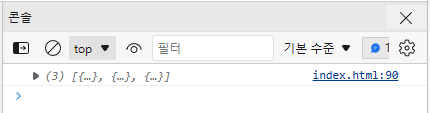
- a의 0번째, 1번째, 2번째 값이 있다.
<script>
let a = [
{'name':'영수','age':27},
{'name':'철수','age':25},
{'name':'순자','age':30}
]
console.log(a)
</script>
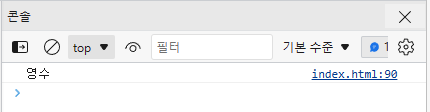
console.log(a[0]['name'])
0번째의 이름이 무엇인가?
2. JQuery
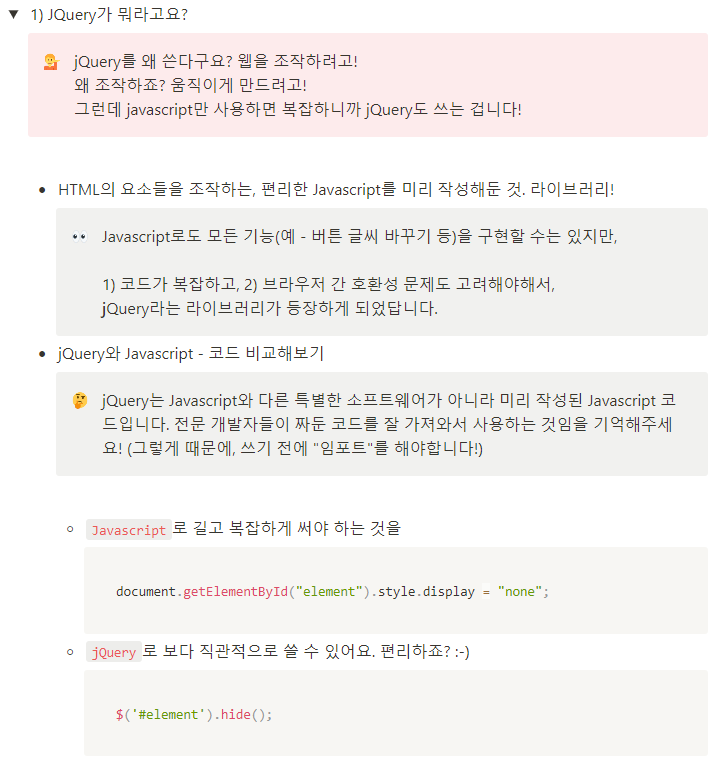
- JQuery의 명찰은 id로 지칭한다.
- 자료형 리스트
- 버튼을 눌렀을 때 id=q1의 이름을 사과로 바꿔줘
function checkResult(){
let a = '사과'
$('#q1').text(a)
}
</script>
<div class="list-part">
<h2>2. 리스트</h2>
<div id="q1">테스트</div>
</div>
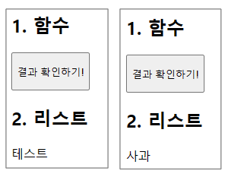
<script>
function checkResult(){
let a = ['사과', '배', '감', '귤']
$('#q1').text(a[1])
}
</script>
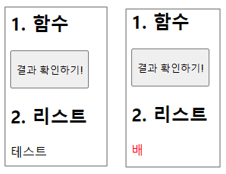
- 딕셔너리 : Q1의 이름을 바꾸고 css 컬로도 바꿔줘
<script>
function checkResult(){
let a = ['사과', '배', '감', '귤']
$('#q1').text(a[1])
$('#q1').css('color', 'red')
}
</script>
$('#q1').css('font-size','40px') 폰트 사이즈를 40px로 바꿔라
- 리스트 디셔너리
<script>
function checkResult(){
let a = ['사과', '배', '감', '귤']
$('#q1').text(a[1])
$('#q1').css('color', 'red')
$('#q1').css('font-size','40px')
let b = {'name':'영수','age':30 }
$('#q2').text(b['name'])
let c = [
{'name':'영수','age':30 },
{'name':'철수','age':35 }
]
$('#q3').text(c[1]['age'])
}
</script>

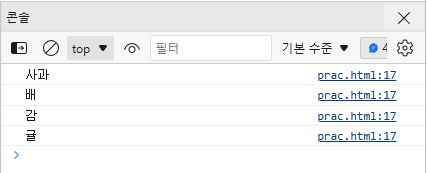
- 반복문
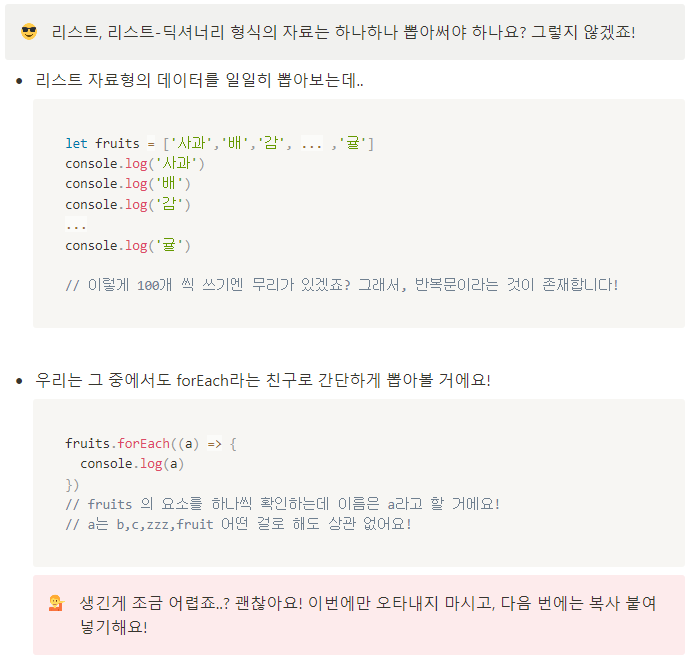
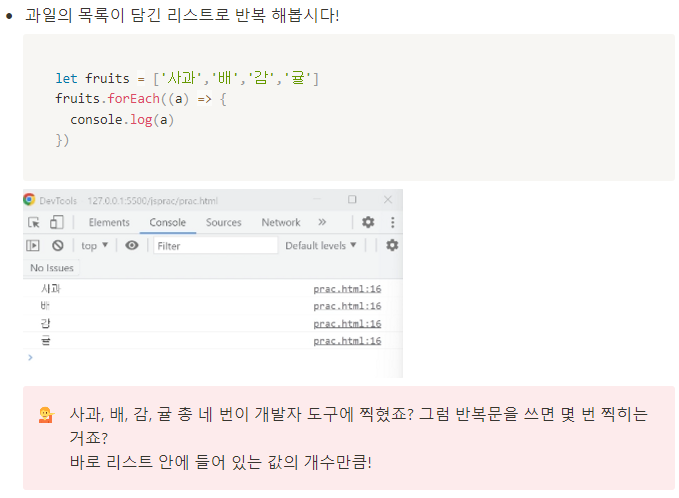
- forEach : 하나씩 꺼내서 보여줘
<script>
let fruits = ['사과', '배', '감', '귤']
fruits.forEach((a)=>{
console.log(a)
})
</script>
- 조건문
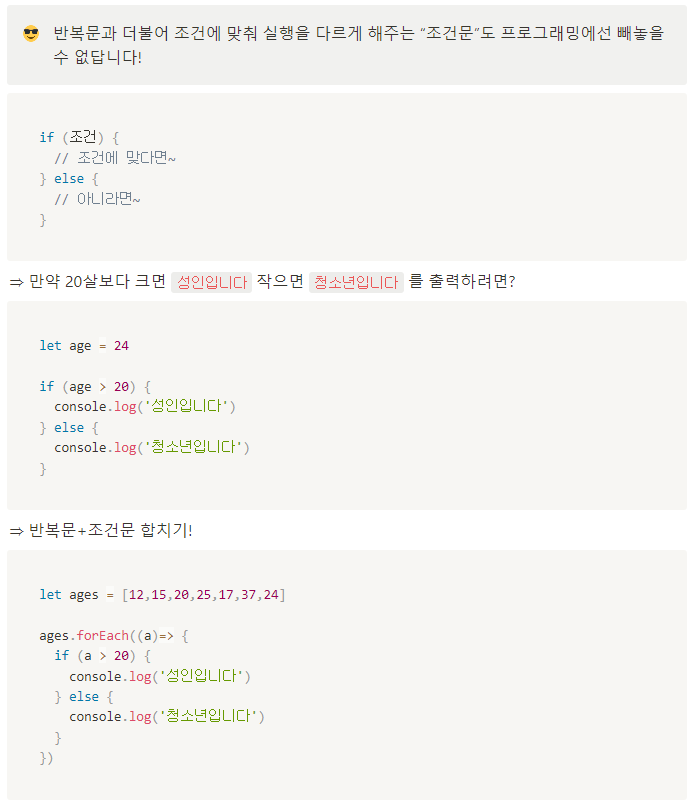
- 조건문 if else
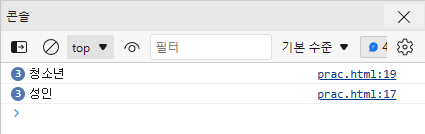
조건문 : 요소의 값을 비교하라
<script>
let age = 24
if(age > 20){
console.log('성인입니다')
}else{
console.log('청소년입니다.')
}
</script>
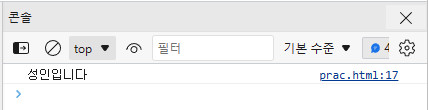
- 조건문+반복문
<script>
let ages = [12, 14, 15, 26, 37, 24]
ages.forEach((a)=>{
if(a>20){
console.log('성인')
}else{
console.log('청소년')
}
})
</script>
3. $('# ').append
JQuery에 자주 쓰이는 친구
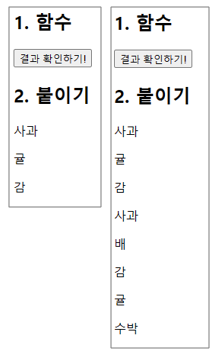
- 변수를 만들고 q1에 리스트에있는변수값을 순차적으로 넣어주기
<script> function checkResult() {
let fruits = ['사과','배','감','귤','수박']
fruits.forEach((a)=>{
let temp_html = `<p>${a}</p>`
$('#q1').append(temp_html)
})
}
</script>
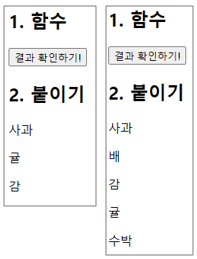
- 사과, 귤, 감을 삭제하고 리스트 fruit에 있는 값을 순차적으로 넣어주자
<script> function checkResult() {
let fruits = ['사과','배','감','귤','수박']
$('#q1').empty()
fruits.forEach((a)=>{
let temp_html = `<p>${a}</p>`
$('#q1').append(temp_html)
})
}
</script>
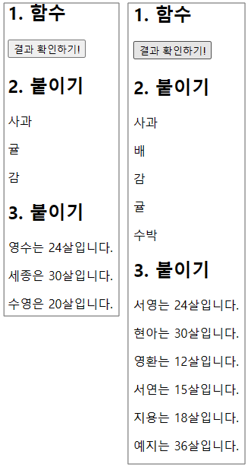
- 기존 값은 초기화해주고 리스트 딕셔너리 people 에 값을 순차적으로 변수로 넣어주자
`(백틱) 오타를 조심하자!
<script> function checkResult() {
let people = [
{'name':'서영','age':24},
{'name':'현아','age':30},
{'name':'영환','age':12},
{'name':'서연','age':15},
{'name':'지용','age':18},
{'name':'예지','age':36}
]
$('#q2').empty()
people.forEach((a)=>{
let name = a['name']
let age = a['age']
let temp_html = `<p> ${name}는 ${age}살입니다.</p>`
$('#q2').append(temp_html)
})
}
</script>
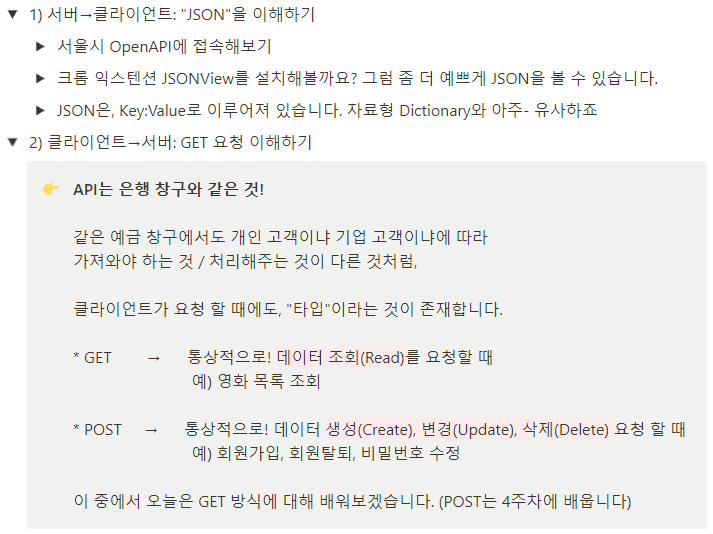
4. 서버 클라이언트 통신 이해하기
서울시 미세먼지 Open API
http://openapi.seoul.go.kr:8088/6d4d776b466c656533356a4b4b5872/json/RealtimeCityAir/1/99
Dictionury
4. fetch
- Fetch는 url로 api의 데이터를 받아오는 것이다.
- Jquery도 Import 후 사용 가능
<script src="https://ajax.googleapis.com/ajax/libs/jquery/3.5.1/jquery.min.js">
- API도 import해서 JSON 형태로 변환해서 사용할거야
fetch url을 가져오고 그리고 json형태로 변환할거야 그리고 데이터를 console.log할거야
<script>
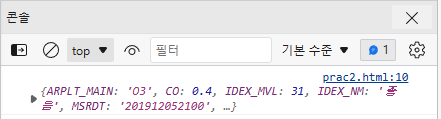
fetch("http://spartacodingclub.shop/sparta_api/seoulair").then(res => res.json()).then(data => {
console.log(data)
})
</script>
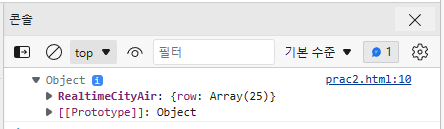
- RealtimeCityAir의 row의 0번째를 가져와
<script>
fetch("http://spartacodingclub.shop/sparta_api/seoulair").then(res => res.json()).then(data => {
console.log(data['RealtimeCityAir']['row'][0])
})
</script>
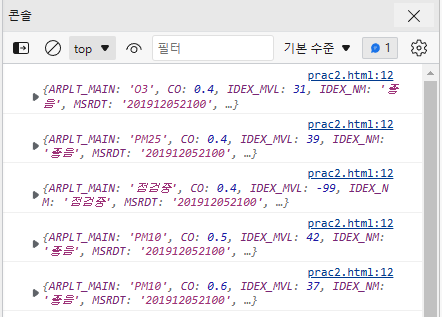
- RealtimeCityAir의 row를 rows 리스트에 담아서 모두 보여줘
<script>
fetch("http://spartacodingclub.shop/sparta_api/seoulair").then(res => res.json()).then(data => {
let rows = data['RealtimeCityAir']['row']
rows.forEach((a) => {
console.log(a)
})
})
</script>
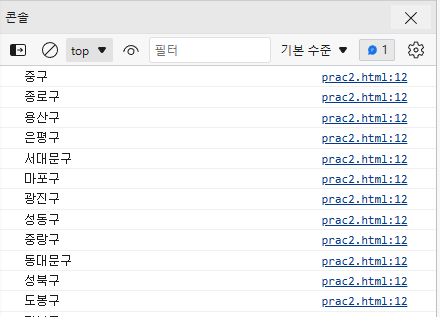
- RealtimeCityAir의 row를 rows 리스트 데이터 중 구(MSRSTE_NM)의 이름만 보여줘
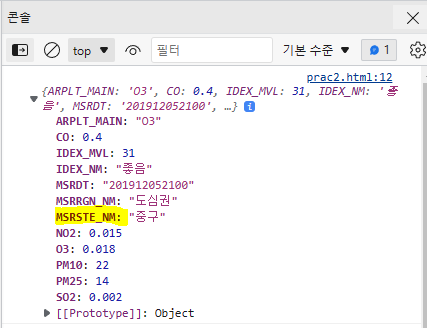
<script>
fetch("http://spartacodingclub.shop/sparta_api/seoulair").then(res => res.json()).then(data => {
let rows = data['RealtimeCityAir']['row']
rows.forEach((a) => {
console.log(a['MSRSTE_NM'])
})
})
</script>
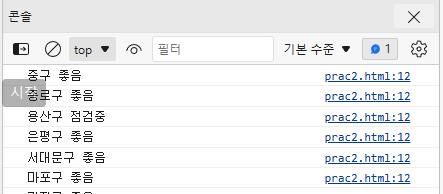
- RealtimeCityAir의 row를 rows 리스트 데이터 중 구(MSRSTE_NM)와 미세먼지 상태(IDEX_NM)를 이름만 보여줘
<script>
fetch("http://spartacodingclub.shop/sparta_api/seoulair").then(res => res.json()).then(data => {
let rows = data['RealtimeCityAir']['row']
rows.forEach((a) => {
console.log(a['MSRSTE_NM'], a['IDEX_NM'])
})
})
</script>
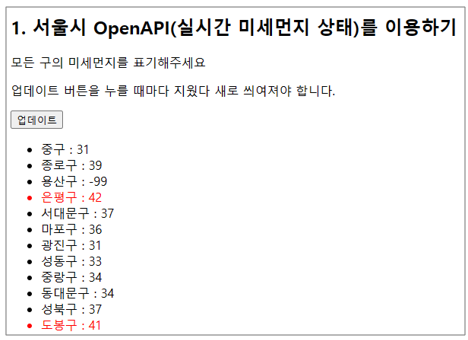
- 버튼을 누르면 기존 리스트 내용은 지우고 구('MSRSTE_NM')와 미세먼지 수치('IDEX_MVL')를 보여주자
<script>
function q1() {
fetch("http://spartacodingclub.shop/sparta_api/seoulair").then((res) => res.json()).then(data => {
let rows = data['RealtimeCityAir']['row']
$('#names-q1').empty()
rows.forEach((a) => {
let gu_name = a['MSRSTE_NM']
let gu_mise = a['IDEX_MVL']
let temp_html = `<li> ${gu_name} : ${gu_mise}</li>`
$('#names-q1').append(temp_html)
});
})
}
</script>

- 버튼을 누르면 기존 리스트 내용은 지우고 구('MSRSTE_NM')와 미세먼지 수치('IDEX_MVL')를 보여주자
그리고 미세먼지 수치가 40이 넘어가면 빨간색으로 표시하자
<script>
function q1() {
fetch("http://spartacodingclub.shop/sparta_api/seoulair").then(res => res.json()).then(data => {
let rows = data['RealtimeCityAir']['row']
$('#names-q1').empty()
rows.forEach((a) => {
let gu_name = a['MSRSTE_NM']
let gu_mise = a['IDEX_MVL']
let temp_html = ``
if(gu_mise > 40){
temp_html = `<li class="bad"> ${gu_name} : ${gu_mise}`
} else{
temp_html = `<li> ${gu_name} : ${gu_mise}</li>`
}
$('#names-q1').append(temp_html)
});
})
}
</script>
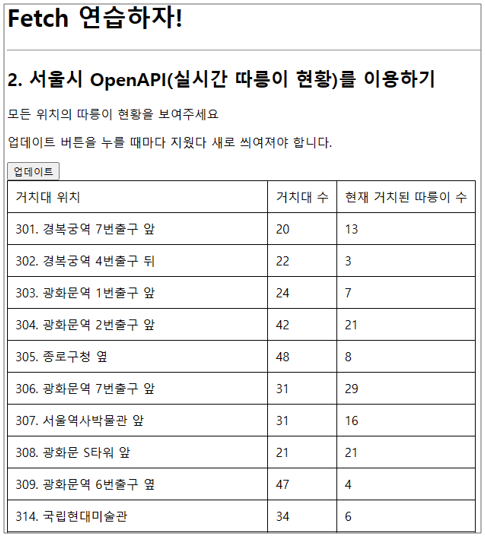
- 서울시 따릉이 API를 통해 거치대위치, 총 자전거 수, 이용가능 수를 표 형태로 보여주자
<script>
function q1() {
fetch("http://spartacodingclub.shop/sparta_api/seoulbike").then(res => res.json()).then(data => {
let rows = data['getStationList']['row']
$('#names-q1').empty()
rows.forEach((a) => {
let name = a['stationName']
let rack = a['rackTotCnt']
let bike = a['parkingBikeTotCnt']
let temp_html = `<tr>
<td>${name}</td>
<td>${rack}</td>
<td>${bike}</td>
</tr>`
$('#names-q1').append(temp_html)
});
});
}
</script>
<script>
function q1() {
}
</script>
<button onclick="q1()">업데이트</button>
버튼을 클릭하면 q1이 업데이트 된다.
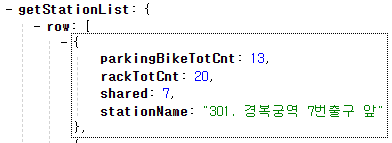
<script>
function q1() {
fetch("http://spartacodingclub.shop/sparta_api/seoulbike").then(res => res.json()).then(data => {
let rows = data['getStationList']['row']
});
}
</script>
Fetch 기본 뼈대를 쓰고 서울시 따릉이 open API Url을 입력한다.
let lows = data['getStationList']['row']
lows라는 변수에 'getStationList'와 'row' 데이터를 담는다.
<script>
function q1() {
fetch("http://spartacodingclub.shop/sparta_api/seoulbike").then(res => res.json()).then(data => {
let rows = data['getStationList']['row']
rows.forEach((a) => {
let name = a['stationName']
let rack = a['rackTotCnt']
let bike = a['parkingBikeTotCnt']
});
});
}
rows의 데이터를 하나씩 뽑아서 name, rack, bike 변수에 담는다.
<script>
function q1() {
fetch("http://spartacodingclub.shop/sparta_api/seoulbike").then(res => res.json()).then(data => {
let rows = data['getStationList']['row']
$('#names-q1').empty()
rows.forEach((a) => {
let name = a['stationName']
let rack = a['rackTotCnt']
let bike = a['parkingBikeTotCnt']
let temp_html = `<tr>
<td>${name}</td>
<td>${rack}</td>
<td>${bike}</td>
</tr>`
$('#names-q1').append(temp_html)
});
});
}
</script>
temp_html에 html 형태로 반복할 정보를 입력한다.
temp_html에서 변수를 지정해줄때에는 ${} 중괄호로 입력해야한다.
$('#names-q1') class에 rows의 변수의 수 만큼 temp_html을 실행한다.
<script>
function q1() {
fetch("http://spartacodingclub.shop/sparta_api/seoulbike").then(res => res.json()).then(data => {
let rows = data['getStationList']['row']
$('#names-q1').empty()
rows.forEach((a) => {
let name = a['stationName']
let rack = a['rackTotCnt']
let bike = a['parkingBikeTotCnt']
let temp_html = `<tr>
<td>${name}</td>
<td>${rack}</td>
<td>${bike}</td>
</tr>`
$('#names-q1').append(temp_html)
});
});
}
</script>
기존에 있던 내용은 모두 지워주고 실행시킨다.
- If else를 통해 bike가 5보다 작으면 빨간색으로 표시해주자
<script>
function q1() {
fetch("http://spartacodingclub.shop/sparta_api/seoulbike").then(res => res.json()).then(data => {
let rows = data['getStationList']['row']
$('#names-q1').empty()
rows.forEach((a) => {
let name = a['stationName']
let rack = a['rackTotCnt']
let bike = a['parkingBikeTotCnt']
let temp_html = ``
if(bike < 5){
temp_html = `<tr class="red">
<td>${name}</td>
<td>${rack}</td>
<td>${bike}</td>
</tr>`
} else{
temp_html = `<tr>
<td>${name}</td>
<td>${rack}</td>
<td>${bike}</td>
</tr>`
}
$('#names-q1').append(temp_html)
});
});
}
</script>

- 2주차 숙제 : index.html 파일에 서울의 날씨 API를 붙여주기
<script>
$(document).ready(function() {
fetch("http://spartacodingclub.shop/sparta_api/weather/seoul").then(res => res.json()).then(data => {
let number = data['temp']
$('#temp').text(number)
});
})
</script>
Number라는 변수에 'temp'를 넣어주고 span id=tmep에 text로 number 값을 넣어주기
$(document).ready(function(){
}
문서를 새로고침 할때마다 자동으로 script가 실행되도록 한다.
2주차 후기 : 오타에 조심하자
오타 찾다가 하루가 다 간다.
'BootChamp' 카테고리의 다른 글
| 웹개발종합반 3주차 개발일지 (0) | 2023.03.20 |
|---|---|
| 웹개발종합반 1주차 개발일지 (0) | 2023.03.19 |